DOEPFER LMK2+ Guide de l'utilisateur Page 24
- Page / 24
- Table des matières
- MARQUE LIVRES
- LMK4+LMK4+ 1
- User's Guide LMK4+ 2
- 1. OPERATION (Hardware) 3
- 1.4 Controls 4
- 2. OPERATION (Software) 6
- 4: SPLIT 7
- 5: CONTROLLER ASSIGN/ACTIVITY 7
- 6: USER DEFINED CONTROLLERS 7
- 7: PRESET PARAMETERS/NAME 7
- 8: PANIC 7
- 2.3.1 Preset (1) 8
- Storing a Preset 9
- REALTIME / M_CHAN 11
- S/T/C/K/ - / - / - /P 11
- 2.3.4 Split (4) 12
- 2.3.7 Parameters/Name 17
- 2.3.8 Panic 19
- APPENDIX A: 20
- AFTERTOUCH-RESPONSE CURVES 21
- VELOCITY-RESPONSE CURVES 21
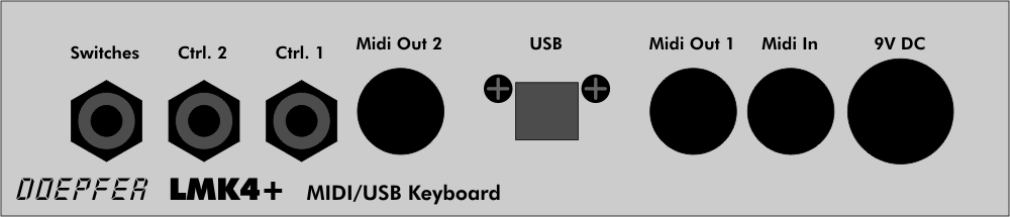
- Appendix F: USB Version 24
- USB version of the back panel 24
Produits connexes et manuels pour Pianos numériques DOEPFER LMK2+
 (24 pages)
 (6 pages)
© 2020, manymanuals.fr. Tous droits réservés | 0.611 s |
 Manymanuals.com
 Manymanuals.de
 Manymanuals.fr
 Manymanuals.it
 Manymanuals.pl
 Manymanuals.cz
 Manymanuals.es
 Manymanuals-pt.com
Commentaires sur ces manuels